Monday 28 February 2011
Friday 25 February 2011
WEEK 4. Feeding geniuses 1. Smart Fats. Tuna patties.
Much of the information presented comes from the interesting book "Optimum Nutrition for your Child´s mind" by Patrick Holford and Deborah Colson.
The authors explain that among the essential nutrients for the brain we can find essential fatty acids. The solid part of our brain is formed by 60% fat. This tissue grows steadily in children. Optimal amounts are necessary to maximize their intelligence. They claim that children with deficient intake of omega 3 and omega 6 have difficulties to learn. The ideal ratio of both fats should be 1:1, while in the West can be around 1:20. The most effective way to balance it, is with the consumption of oily fish, cold water fish that eat other fish. Among the oily fish we have: herring, mackerel, sardines, anchovies, salmon and tuna. Fish reared in captivity may be less effective depending on their food. Fresh fish is better than canned and preferred small species than large due to the possibility of containing mercury which is a toxic mineral, and therefore an anti-nutrient for the brain.
On the other hand we should avoid hydrogenated fats and deep fried foods (French fries, nuggets ...) because these degraded fats replace DHA (family of omega 3) and also block their formation. I do not dare you starting with salmon sashimi (raw sheets), although sometimes kids surprise us. Dani tried it and loves it.
David asks salmon for dinner, pointing to a pretty picture on the fridge.
Our week activity is to make very easy tuna patties with children. This dish is very handy when there is not much fresh food in the fridge.Ingredients:
2 Tuna cans.
2 Tomato sauce tablespoons .
Wafers for 16 turnovers.
2 Tomato sauce tablespoons .
Wafers for 16 turnovers.
Process:
1 Invite kids to help us. Drain the cans of tuna and mix with two tomato sauce tablespoons in a bowl.
2 Extend wafers on baking paper on the oven plate. Put a teaspoon of mixture into each.
3 Fold the wafer and close the edges by pressing with fingers or fork. (If you have time, decorate making faces with chopped olives...)
4 Bake at 190 degrees for 15 minutes or until you see it begins to brown.
Tuesday 22 February 2011
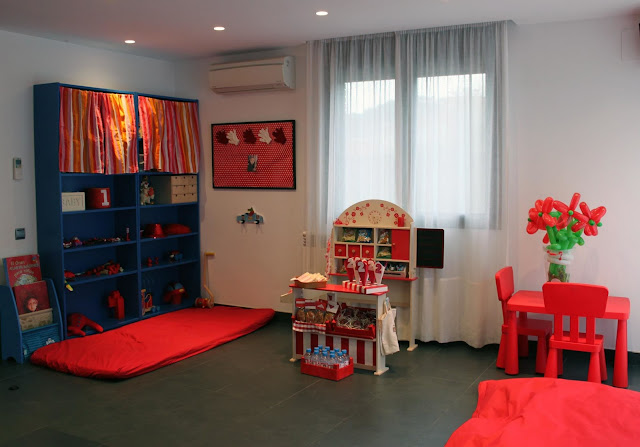
David´s birthday party, red theme.
My little David turned 2 years old and he celebrated it with his friends in a great red party.
First he delivered the invitations, door hangers with the number 2, the age of most of the guests who might put a picture of them in the party instead of David´s. Click here to see how to make them.
We welcomed everyone with a little present.
Red tiaras for the princesses and red glasses for the princes.
Guests had to come dressed in red. Here is David. The shirt is inspired by an idea of Sandra Kleist fantastic blog the winding road. It is a red number 2 with the text "David" inside. If you want to see how to make it, click here.
Dani dressed in red.
One scene.
Another one.
This is the children's buffet. It is a shop that Santa Claus brought David for Christmas. I think I saw a Santa Claus out of a Lidl supermarket with one of them and I think it cost about 35 euros.
There were baskets, one with red apples. To see how to make them click here.
Muffins and chocolate croissants, to see how to make the packing, click here.
A basket of water bottles with the photo of each guest. Many parties end up with a million glasses or drinking from one which is not yours. I think this is a nice solution. To see them click here.
Popcorn cones. To see them click here.
An exhibitor with lollipops. The base is a box lined with paper. The support is a paper towel tube and inside there is a piece of Porex to stick the lollipops.
Candy pacifiers held on an Eva rubber band. I made 2 holes with paper punch and attached with curved scissors. In each, I held a pacifier ring hook.
Children like small things. These are sandwiches of ham and cheese. I cut each sandwich into 3 strips and then wrapped in colored paper.
Adult buffet had tortillas (a success, thanks mom), goat cheese canapes with tomato jam and nuts, sausage, very good braid from Logroño, and other sweets.
Red fruits...
To decorate I made a cloth garland with the name of my kid. They are simple rectangles cut with zigzag scissors, just folded and sewn into the side of the rope. Eva rubber letters are sewn to the fabric.
Another cloth garland, this time into triangles.
Lamp decorated with simple red wool.
Alongside the kids buffet there was a table in case the kids wanted to eat sat down. What a silly idea! Who has seen a toddler sat at a party? The center of flowers is red balloons. If you want the initial ideas to make balloon figures, click here. If you want to see how to make the figure of the flower, click here.
For activities: David loves balls, dancing and Mickey Mouse. So we played mini disco music and then a Mickey Mouse chapter.
I did not dare to fill the room with red balls, but I replaced them with a bunch of red balloons in a fabler canopy from Ikea. It was fun when we let them go at once.
I also stuck a roll of paper on the floor and left red stickers to be stuck by the kids.Also enable an area with red toys. Wigs and hats were a success.
Finally on a balloon decoration I placed some swords. If you want to see the guests in action click here.
David had his delicious, chocolate and strawberry cake. All the guests sang, if you want to see the guests click here.
The next day David was playing with the gift of grandparents, great plasmacar that he loves.
Shirt, red party.
David T-shirt inspired by Sandra´s in their great birthday party. In my case it is a number 2 with the text "David" inside. (See instructions in her fantastic familiar blog The winding road.)
Labelled muffins, red party.
Materials:
Muffins, croissants ... individually bagged.
Red or white cardboard.
Eva rubber sheet (opposite color).
Thread or glue.
Tools:
Scissors and optional zigzag scissors.
Stapler.
Optional: hole punch machine.
Optional: Sewing machine.
Process:
1 Cut a rectangle of 8x11cm. (8 = width roll bag I chose, modify depending on the width of yours)
2 Fold in half.
3 Drill a hole centered through on the bended side.
Sew 4 Eva rubber shapes.
5 Staple the cardboard with the bag between.
Popcorn cones, red theme party.
The support of the cones is a shoebox. I lined the lid and the box with two different roles. Then, with a cutter I made four aligned triangles on the back and another three aligned ones on the front, both on lid and box.
Materials for twelve cones: 1 Red or white cardboard 50x65cm.
1 Eva rubber sheet (opposite color to the cardboard).
Double sided tape.
Thread or glue to adhere the number:
Tools: Normal or zigzag scissors.
Ruler.
Wheel tool to make holes.
Optional: Sewing machine.
2 Trim with zigzag scissors the number 2.
3 Cut the cardboard into 12 rectangles 15x16.5cm. Note: Divide the side of 50 cm in 3 parts of 16.5cm.
4 Print the template. (Download) Place a cardboard over and make holes with the wheel tool for folding lines.
5 Sew or paste the number centered.
6 Place double sided tape on the tab.
7 Fold and glue to the tape.
Labeled bottles, red theme party.
To place the photos in Photoshop:
Open child photo file.
1: Select child's face with widow and copy (Ctrl + C)
2 Open label file: Select the area inside the frame with the magic wand.
3 Edit / Paste Special / Paste Into.
4 Then you can scale and move to center.
5 Repeat with each photo.
Subscribe to:
Posts (Atom)


